Difference between revisions of "User talk:Akaya"
| (5 intermediate revisions by the same user not shown) | |||
| Line 2: | Line 2: | ||
[[File: compass.png]] | [[File: compass.png]] | ||
The following will walk you through the process of creating your own clickable compass using the Geyser framework. | The following will walk you through the process of creating your own clickable compass using the Geyser framework. | ||
| + | ==Setup the image files== | ||
| + | The compass requires a handful of images to work properly. You can find them here: https://www.dropbox.com/sh/53l7xrn4ds35wnq/WpWOziVKmH <br> | ||
| + | Download each image and place it in your profile folder. You can find your profile folder with getMudletHomeDir()<br> | ||
| + | If you're using Mudlet 2.1+ you can enter '''lua getMudletHomeDir()''' from the command line to return the profile folder path on your computer. | ||
| + | |||
==Create a new script== | ==Create a new script== | ||
Script Name: '''''compass.resize'''''<br> | Script Name: '''''compass.resize'''''<br> | ||
| Line 11: | Line 16: | ||
==Create a global table or namespace== | ==Create a global table or namespace== | ||
| − | Creating | + | Creating a global table will make each of your variables unique. Our namespace will be called '''''compass''''' and everything we make from here on out will be stored within the compass table. We'll also add a few values to it: dirs and ratio. '''''compass.dirs''''' will store each direction while '''''compass.ratio''''' will store the ratio of our screen size so you can 'square up' your compass. |
<lua>compass = compass or { | <lua>compass = compass or { | ||
dirs = {"nw","n","ne","w","center","e","sw","s","se"}, | dirs = {"nw","n","ne","w","center","e","sw","s","se"}, | ||
| Line 134: | Line 139: | ||
compass.resize()</lua> | compass.resize()</lua> | ||
| + | |||
| + | =Create a Tabbed Window= | ||
| + | [[File: tabwindow.png]] | ||
| + | The following will walk you through the process of creating your own tabbed window using the Geyser framework. | ||
| + | |||
| + | ==Create a new script== | ||
| + | Script Name: '''''Tabbed Window'''''<br> | ||
| + | Every snippet of code will be placed within this script. | ||
| + | ==Create a global table== | ||
| + | Creating a global table will make each of your variables unique. Our namespace will be called '''''menu''''' and everything we make from here on out will be stored within the menu table. We'll also add a few values to it: tabs, color1, color2, width, height and current. <br> | ||
| + | ''''tabs'''' will be a table that stores all our tab names. If we want our tabs to have different names, we alter this table.<br> | ||
| + | ''''color1'''' and ''''color2'''' will store the colors of our tabbed window. If we want to change the color of our tabbed window, we alter these values.<br> | ||
| + | ''''width'''' and ''''height'''' will store the size of our tabbed window. If we want to change the size of the tabbed window, we alter these values.<br> | ||
| + | ''''current'''' keeps track of which tab is selected. Since no tab is selected at startup, we'll make this an empty string.<br> | ||
| + | <lua>menu = menu or { | ||
| + | tabs = {"Tab1","Tab2","Tab3","Tab4"}, | ||
| + | color1 = "rgb(0,0,70)", | ||
| + | color2 = "rgb(0,0,50)", | ||
| + | width = "20%", | ||
| + | height = "40%", | ||
| + | current = "", | ||
| + | }</lua> | ||
| + | ==Create the main container== | ||
| + | Our tabbed window will need a container. This will be the bottom layer. Containers are invisible so no need to set a stylesheet. | ||
| + | <lua>menu.container = Geyser.Container:new({ | ||
| + | name = "menu.back", | ||
| + | x = "50%", y = "25%", | ||
| + | width = menu.width, | ||
| + | height = menu.height, | ||
| + | },main)</lua> | ||
| + | ==Create an HBox== | ||
| + | All of our tabs will be evenly spaced. So we'll create an HBox to sit at the top of our container. | ||
| + | <lua>menu.header = Geyser.HBox:new({ | ||
| + | name = "menu.header", | ||
| + | x = 0, y = 0, | ||
| + | width = "100%", | ||
| + | height = "10%", | ||
| + | },menu.container)</lua> | ||
| + | ==Create a label== | ||
| + | This label will serve as a container for each window. It sits right underneath the HBox we just created for the tabs. | ||
| + | <lua>menu.footer = Geyser.Label:new({ | ||
| + | name = "menu.footer", | ||
| + | x = 0, y = "10%", | ||
| + | width = "100%", | ||
| + | height = "90%", | ||
| + | },menu.container)</lua> | ||
| + | We don't want this to be a big grey box at startup, so we'll set the stylesheet to appear like the rest of the windows. | ||
| + | <lua> | ||
| + | menu.footer:setStyleSheet([[ | ||
| + | background-color: ]]..menu.color1..[[; | ||
| + | border-bottom-left-radius: 10px; | ||
| + | border-bottom-right-radius: 10px; | ||
| + | ]])</lua> | ||
| + | Each window actually has two labels. One for the light blue background, and another for the dark blue center. This will create that dark blue center. | ||
| + | <lua>menu.center = Geyser.Label:new({ | ||
| + | name = "menu.center", | ||
| + | x = 0, y = 0, | ||
| + | width = "100%", | ||
| + | height = "100%", | ||
| + | },menu.footer) | ||
| + | menu.center:setStyleSheet([[ | ||
| + | background-color: ]]..menu.color2..[[; | ||
| + | border-radius: 10px; | ||
| + | margin: 5px; | ||
| + | ]])</lua> | ||
| + | ==Add your tabs and their windows== | ||
| + | Now we'll want to add our tabs and windows. We do this in a single for loop of the ''''menu.tabs'''' table since it holds all our tab names. | ||
| + | <lua>for k,v in pairs(menu.tabs) do | ||
| + | </lua> | ||
| + | This will create the tabs. Each tab will be named: menu.<tabname>tab | ||
| + | <lua> | ||
| + | menu[v.."tab"] = Geyser.Label:new({ | ||
| + | name = "menu."..v.."tab", | ||
| + | },menu.header) | ||
| + | </lua> | ||
| + | Here is where we set the tab stylesheet. Each tab has a rounded top, so we set the border-radius of the top-left and top-right to 10px. Each tab has a small space for separation so we give the right and left sides a tiny margin of 1px. | ||
| + | <lua> | ||
| + | menu[v.."tab"]:setStyleSheet([[ | ||
| + | background-color: ]]..menu.color1..[[; | ||
| + | border-top-left-radius: 10px; | ||
| + | border-top-right-radius: 10px; | ||
| + | margin-right: 1px; | ||
| + | margin-left: 1px; | ||
| + | ]]) | ||
| + | </lua> | ||
| + | This will display the name of each tab on the tab. | ||
| + | <lua> | ||
| + | menu[v.."tab"]:echo("<center>"..v) | ||
| + | </lua> | ||
| + | We need our tabs to do stuff when clicked, so we'll assign it a callback function, '''''menu.click''''', which we'll create later on. Our tab name is the argument. | ||
| + | <lua> | ||
| + | menu[v.."tab"]:setClickCallback("menu.click",v) | ||
| + | </lua> | ||
| + | Now we create the windows that appear when each tab is clicked. Each window has two labels, one atop the other. The first, which we'll create here, has rounded edges on its bottom. | ||
| + | <lua> | ||
| + | menu[v] = Geyser.Label:new({ | ||
| + | name = "menu."..v, | ||
| + | x = 0, y = 0, | ||
| + | width = "100%", | ||
| + | height = "100%", | ||
| + | },menu.footer) | ||
| + | |||
| + | menu[v]:setStyleSheet([[ | ||
| + | background-color: ]]..menu.color1..[[; | ||
| + | border-bottom-left-radius: 10px; | ||
| + | border-bottom-right-radius: 10px; | ||
| + | ]]) | ||
| + | </lua> | ||
| + | The second label serves as the window's center and has rounded edges on all sides. And a margin of 5px from it's parent, the label we just created. When adding stuff to your windows, this is the label you'll want to use. '''''menu.<tabname>center''''' | ||
| + | <lua> | ||
| + | menu[v.."center"] = Geyser.Label:new({ | ||
| + | name = "menu."..v.."center", | ||
| + | x = 0, y = 0, | ||
| + | width = "100%", | ||
| + | height = "100%", | ||
| + | },menu[v]) | ||
| + | </lua><lua> | ||
| + | menu[v.."center"]:setStyleSheet([[ | ||
| + | background-color: ]]..menu.color2..[[; | ||
| + | border-radius: 10px; | ||
| + | margin: 5px; | ||
| + | ]]) | ||
| + | </lua> | ||
| + | Finally, we hide all the windows and end the for loop. | ||
| + | <lua> | ||
| + | menu[v]:hide() | ||
| + | end</lua> | ||
| + | ==Create a callback function== | ||
| + | The last step is to create our callback function for when a tab is clicked. This will hide that tab that is stored in '''''menu.current''''', set menu.current to the clicked tab, and then show the menu.current tab. | ||
| + | <lua>function menu.click(tab) | ||
| + | menu[menu.current]:hide() | ||
| + | menu.current = tab | ||
| + | menu[menu.current]:show() | ||
| + | end</lua> | ||
| + | ==Adding content to your windows== | ||
| + | Add content to '''menu.<tab name>center''' | ||
| + | So if we wanted to display our gold in a window we could:<lua>menu.Tab1center:echo(myGold)</lua> | ||
| + | If we wanted to add a map to a window we could: | ||
| + | <lua>myMap = Geyser.Mapper:new({ | ||
| + | name = "myMap", | ||
| + | x = 0, y = 0, | ||
| + | width = "100%", | ||
| + | height = "100%", | ||
| + | },menu.Tab2center)</lua> | ||
Latest revision as of 20:09, 7 September 2013
Create a Clickable Compass
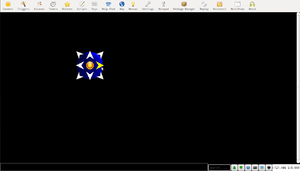
 The following will walk you through the process of creating your own clickable compass using the Geyser framework.
Setup the image files
The compass requires a handful of images to work properly. You can find them here: https://www.dropbox.com/sh/53l7xrn4ds35wnq/WpWOziVKmH
Download each image and place it in your profile folder. You can find your profile folder with getMudletHomeDir()
If you're using Mudlet 2.1+ you can enter lua getMudletHomeDir() from the command line to return the profile folder path on your computer.
Create a new script
Script Name: compass.resize
Registered Event Handlers: sysWindowResizeEvent
Every snippet of code will be placed within this script.
Store the screen size
We'll want to store the screen size in some local variables so they can be easily referenced to later on. <lua>local mw, mh = getMainWindowSize()</lua>
Create a global table or namespace
Creating a global table will make each of your variables unique. Our namespace will be called compass and everything we make from here on out will be stored within the compass table. We'll also add a few values to it: dirs and ratio. compass.dirs will store each direction while compass.ratio will store the ratio of our screen size so you can 'square up' your compass. <lua>compass = compass or {
 dirs = {"nw","n","ne","w","center","e","sw","s","se"},
 ratio = mw / mh
}</lua>
Create the parent label
The 'parent label' refers to the label on the bottom layer. The entire compass will be created within this label. It's container is main for it's parent is the main window. <lua>compass.back = Geyser.Label:new({
 name = "compass.back",
 x = "25%",
 y = "25%",
 width = "10%",
 height = "10%",
},main)</lua>
Set the parent label stylesheet
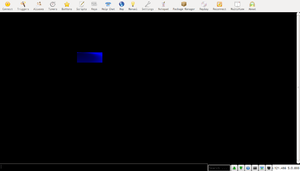
This will create the blue sphere that makes up most of the compass. The background color is a radial gradient that goes from a deep blue to a brighter shade. The border radius rounds the edges. When the radius is exactly half of the label width it forms a circle. The arrows of the compass actually protrude from the sphere so we give it a margin to suck it in a bit for this effect. <lua>compass.back:setStyleSheet([[
 background-color: QRadialGradient(cx:.3,cy:1,radius:1,stop:0 rgb(0,0,50),stop:.5 rgb(0,0,100),stop:1 rgb(0,0,255));
 border-radius: ]]..tostring(compass.back:get_width()/2-14)..[[px;
 margin: 10px;
]])</lua>
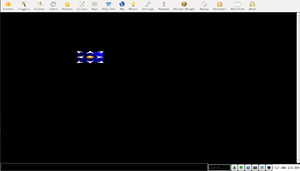
Create a 3x3 grid
The compass is split into 9 sections. One for each cardinal direction plus an extra space that sits in the center. This 3x3 grid is created by 3 VBoxes that sit within a single HBox (or vice versa but I flipped a coin and this is what it gave me).
So first off, we create the HBox. It will be the same size as its parent, compass.back.
<lua> compass.box = Geyser.HBox:new({
   name = "compass.box",
   x = 0,
   y = 0,
   width = "100%",
   height = "100%",
 },compass.back)</lua>
Next, we create our 3 VBoxes. You don't need to specify position or size because these are placed within compass.box, an HBox. <lua> compass.row1 = Geyser.VBox:new({
     name = "compass.row1",
   },compass.box)
   compass.row2 = Geyser.VBox:new({
     name = "compass.row2",
   },compass.box)
   compass.row3 = Geyser.VBox:new({
     name = "compass.row3",
   },compass.box)</lua>
Finally, we add our 9 labels. Take note that they are split up into even groups of 3. Each group is placed into a different compass.row# <lua> compass.nw = Geyser.Label:new({
       name = "compass.nw",
     },compass.row1)
     compass.w = Geyser.Label:new({
       name = "compass.w",
     },compass.row1)

     compass.sw = Geyser.Label:new({
       name = "compass.sw",
     },compass.row1)

     compass.n = Geyser.Label:new({
       name = "compass.n",
     },compass.row2)

     compass.center = Geyser.Label:new({
       name = "compass.center",
     },compass.row2)
     compass.s = Geyser.Label:new({
       name = "compass.s",
     },compass.row2)
     compass.ne = Geyser.Label:new({
       name = "compass.ne",
     },compass.row3)

     compass.e = Geyser.Label:new({
       name = "compass.e",
     },compass.row3)

     compass.se = Geyser.Label:new({
       name = "compass.se",
     },compass.row3)</lua>
Create a callback function
We'll want our compass to head in the direction of the arrow we're clicking. This is where we specify so. When the arrow is clicked, this function will be ran with the arrow direction as the argument. <lua>function compass.click(name)
send(name)
end</lua>
Create the hover functions
We want our arrows to turn yellow when we hover over them. We do so by simply resetting the label's stylesheet and changing the border image. Don't forget to include the margin as we still want that. <lua>function compass.onEnter(name)
 compass[name]:setStyleSheet([[
   border-image: url("]]..getMudletHomeDir()..User talk:Akaya/..name..[[hover.png");
   margin: 5px;
 ]])
end
function compass.onLeave(name)
 compass[name]:setStyleSheet([[
   border-image: url("]]..getMudletHomeDir()..User talk:Akaya/..name..[[.png");
   margin: 5px;
 ]])
end</lua>
Set the stylesheets in the grid
Each of the 9 labels need an image of an arrow. Rather than setting each individually, we'll iterate over the compass.dirs table we made awhile back and add the respective image to each. The names of images are a reflection of the compass.dirs table. This keeps it consistent and easy to refer to. During the iteration, the callback, setLabelOnEnter and setLabelOnLeave are also set for each label. <lua>for k,v in pairs(compass.dirs) do
 compass[v]:setStyleSheet([[
   border-image: url("]]..getMudletHomeDir()..User talk:Akaya/..v..[[.png");
   margin: 5px;
 ]])
 compass[v]:setClickCallback("compass.click",v)
 setLabelOnEnter("compass."..v,"compass.onEnter",v)
 setLabelOnLeave("compass."..v,"compass.onLeave",v)
end</lua>
Resize the compass into a square
Most screen size ratios aren't a perfect 1:1. This will cause a 10% x 10% label to be far from square. By multiplying our height (the smaller of the two numbers) by our compass.ratio we set earlier, we can resize our compass to a near perfect square. This function is also the name of our script because we want it to run each time sysWindowResizeEvent is raised. <lua>function compass.resize()
compass.back:resize(compass.back:get_width(),math.floor(compass.back:get_height()*compass.ratio))
end
compass.resize()</lua>
Create a Tabbed Window
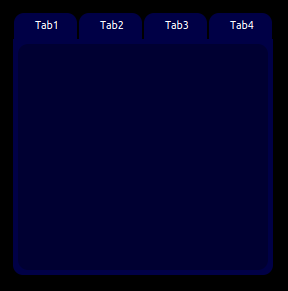 The following will walk you through the process of creating your own tabbed window using the Geyser framework.
Create a new script
Script Name: Tabbed Window
Every snippet of code will be placed within this script.
Create a global table
Creating a global table will make each of your variables unique. Our namespace will be called menu and everything we make from here on out will be stored within the menu table. We'll also add a few values to it: tabs, color1, color2, width, height and current.
'tabs' will be a table that stores all our tab names. If we want our tabs to have different names, we alter this table.
'color1' and 'color2' will store the colors of our tabbed window. If we want to change the color of our tabbed window, we alter these values.
'width' and 'height' will store the size of our tabbed window. If we want to change the size of the tabbed window, we alter these values.
'current' keeps track of which tab is selected. Since no tab is selected at startup, we'll make this an empty string.
<lua>menu = menu or {
 tabs = {"Tab1","Tab2","Tab3","Tab4"},
 color1 = "rgb(0,0,70)",
 color2 = "rgb(0,0,50)",
 width = "20%",
 height = "40%",
 current = "",
}</lua>
Create the main container
Our tabbed window will need a container. This will be the bottom layer. Containers are invisible so no need to set a stylesheet. <lua>menu.container = Geyser.Container:new({
 name = "menu.back",
 x = "50%", y = "25%",
 width = menu.width,
 height = menu.height,
},main)</lua>
Create an HBox
All of our tabs will be evenly spaced. So we'll create an HBox to sit at the top of our container. <lua>menu.header = Geyser.HBox:new({
 name = "menu.header",
 x = 0, y = 0,
 width = "100%",
 height = "10%",
},menu.container)</lua>
Create a label
This label will serve as a container for each window. It sits right underneath the HBox we just created for the tabs. <lua>menu.footer = Geyser.Label:new({
 name = "menu.footer",
 x = 0, y = "10%",
 width = "100%",
 height = "90%",
},menu.container)</lua> We don't want this to be a big grey box at startup, so we'll set the stylesheet to appear like the rest of the windows. <lua> menu.footer:setStyleSheet([[
 background-color: ]]..menu.color1..[[;
 border-bottom-left-radius: 10px;
 border-bottom-right-radius: 10px;
]])</lua> Each window actually has two labels. One for the light blue background, and another for the dark blue center. This will create that dark blue center. <lua>menu.center = Geyser.Label:new({
 name = "menu.center",
 x = 0, y = 0,
 width = "100%",
 height = "100%",
},menu.footer) menu.center:setStyleSheet([[
 background-color: ]]..menu.color2..[[;
 border-radius: 10px;
 margin: 5px;
]])</lua>
Add your tabs and their windows
Now we'll want to add our tabs and windows. We do this in a single for loop of the 'menu.tabs' table since it holds all our tab names. <lua>for k,v in pairs(menu.tabs) do </lua> This will create the tabs. Each tab will be named: menu.<tabname>tab <lua>
 menu[v.."tab"] = Geyser.Label:new({
   name = "menu."..v.."tab",
 },menu.header)
</lua> Here is where we set the tab stylesheet. Each tab has a rounded top, so we set the border-radius of the top-left and top-right to 10px. Each tab has a small space for separation so we give the right and left sides a tiny margin of 1px. <lua>
 menu[v.."tab"]:setStyleSheet([[
   background-color: ]]..menu.color1..[[;
   border-top-left-radius: 10px;
   border-top-right-radius: 10px;
   margin-right: 1px;
   margin-left: 1px;
 ]])
</lua> This will display the name of each tab on the tab. <lua>
menu[v.."tab"]:echo("
</lua> We need our tabs to do stuff when clicked, so we'll assign it a callback function, menu.click, which we'll create later on. Our tab name is the argument. <lua>
menu[v.."tab"]:setClickCallback("menu.click",v)
</lua> Now we create the windows that appear when each tab is clicked. Each window has two labels, one atop the other. The first, which we'll create here, has rounded edges on its bottom. <lua>
 menu[v] = Geyser.Label:new({
   name = "menu."..v,
   x = 0, y = 0,
   width = "100%",
   height = "100%",
 },menu.footer)
 menu[v]:setStyleSheet([[
   background-color: ]]..menu.color1..[[;
   border-bottom-left-radius: 10px;
   border-bottom-right-radius: 10px;
 ]])
</lua> The second label serves as the window's center and has rounded edges on all sides. And a margin of 5px from it's parent, the label we just created. When adding stuff to your windows, this is the label you'll want to use. menu.<tabname>center <lua>
 menu[v.."center"] = Geyser.Label:new({
   name = "menu."..v.."center",
   x = 0, y = 0,
   width = "100%",
   height = "100%",
 },menu[v])
</lua><lua>
 menu[v.."center"]:setStyleSheet([[
   background-color: ]]..menu.color2..[[;
   border-radius: 10px;
   margin: 5px;
 ]])
</lua> Finally, we hide all the windows and end the for loop. <lua>
menu[v]:hide()
end</lua>
Create a callback function
The last step is to create our callback function for when a tab is clicked. This will hide that tab that is stored in menu.current, set menu.current to the clicked tab, and then show the menu.current tab. <lua>function menu.click(tab)
 menu[menu.current]:hide()
 menu.current = tab
 menu[menu.current]:show()
end</lua>
Adding content to your windows
Add content to menu.<tab name>center So if we wanted to display our gold in a window we could:<lua>menu.Tab1center:echo(myGold)</lua> If we wanted to add a map to a window we could: <lua>myMap = Geyser.Mapper:new({
 name = "myMap",
 x = 0, y = 0,
 width = "100%",
 height = "100%",
},menu.Tab2center)</lua>
